Monday, March 29, 2010

canadian butter tarts

So apparently here in Canada, Butter Tarts are a special treat! Since i have been here i have seen them around, but I had never heard of them until i came here, then silly me presumed to think they had something to do with butter. Well, no. Just lots of sweet toffee like sugary fillling and lovely light pastry and gooey centers...and...ok. Recipe time.

To start with i browsed online, i checked flickr for a recipe and found alida saxon's recipe which i may add look divine and my husband says that's what he knows them to look like =)
Then i browsed Tastespotting which is a nice way to find unique ideas or different angles on lots of recipes. This is where i found Warm Vanilla Sugar and i personally really liked the look of hers! Then somehow in my daze of buttery tarts...i found The Back of the Cupboard's Recipe and had come to a decision.

Most of the recipes filling ingredients were much of a muchness. So i figured i couldn't go wrong there. But the sound of cream cheese pastry really had me at hello. Mhmm.
So i decided to try Warm Vanilla Sugar's Recipe.

Recipe for ~Butter Tarts ~ Courtesy of :Warm Vanilla Sugar

This recipe makes 12 lovely butter tarts.
The pastry makes enough for 24

Ingredients:Tart Crust:

2 cups flour
1/4 tsp salt
1/4 tsp baking powder
6oz cold cream cheese
1 cup cold unsalted butter
2 tbsp ice water

Filling:
½ cup brown sugar
½ cup corn syrup
¼ cup unsalted butter
1 egg
1 tsp vanilla
¼ tsp salt
*1/4 cup raisins or pecans if desired

Directions:

Crust:

1. Preheat oven to 350 F (180 C). Butter a 12-cup muffin pan.

2. Place the flour, salt, and baking powder in a medium bowl. Grate in the butter and cut the cream cheese into chunks before adding to the mixture.

3. Then mix together until the mixture resembles fine crumbs. Stir in enough water to form a firm dough. Wrap in plastic wrap and refrigerate for 30 minutes.

4. Roll out the dough on a lightly floured surface to 3mm thick. Use a circular fluted cookie cutter to cut out 12 dough rounds. Press the dough rounds into the prepared cups.

Filling:

5. With a mixer on high speed, beat the egg until frothy. Beat in the rest of the filling ingredients

6. Spoon the filling into the cups until almost full. Bake until piecrust in browned 20-30 mins.
Wait at least 10 minutes until cooled off before trying to take them out, So sticky!

Personal Notes:Mine took around 18-20 minutes to become golden and they turned out lovely! I also rolled the pastry around 5mm thick and even though it was thicker than the recipe stated i think it was so light delicious it complimented the tart extremely well =) I also made them plain, although next time i'm going to use pecans because WOW that can only make these scrumptious tarts better!

My husband was incredibly excited to come home to these! And he said they were just as he remembered! He had had a really busy day and butter tarts with a hot cuppa coffee was just what ne needed! My work here is done, thankyou to all my fellow flickrer's and blogger's who helped me with this one =) I learned a new recipe, found a new favourite tart pastry and became a little more Canadian, hehe!

Friday, March 26, 2010

cheesy cheddar bites

So my husband asked for a savoury snack tonight. I think those caramel cookies took their toll! I found this recipe i had for cheesy cheddar bites, and remember them being quite delicious!
Simple and easy to make to boot!

2 cup all-purpose flour
1 tsp. salt
1/2 tsp. white ground pepper (optional)
1/2 cup cold salted butter, cut into small pieces
300 grated cheese, i used cheddar
Extra water

Rub the butter into the flour, salt and pepper.
Add grated cheese and coat completely with the flour mixture.
Slowly add water until the mix is dough like, kneading to mix.
Mould dough into a large disc and wrap in plastic, and chill for 30 minutes or overnight.
Chilling the dough gives the flour/gluten time to rest and reform, and to firm up the butter for a puffier biscuit!
Roll the dough out to 5mm thickness on greaseproof paper, rolls out sort of like pizza dough.
Roll the dough thicker and they will be a softer biscuit, roll the dough thinner and they will be crunchier =)
Using a knife or pizza cutter, cut 1 inch squares, then bake at 180°C/350°F for 15-20 minutes or until biscuits are golden brown..

Remove from oven and allow to cool. Store in an airtight container.

I tend to bake off as many as i need for the day and keep the dough in the fridge. These are best eaten fresh as they can go soft even in an airtight container.

I've added mozarella or parmesan, you can pretty much make these cheesy treats any flavour you desire cheesewise! I made triangles this time, for quick munching purposes, but little rounds go nice also, Happy snacking =)

Wednesday, March 24, 2010

dulce de leche duos

Ok, so all i can say is WOW.
Thankyou Spork or Foon? for showing me these and leading me to your blog resulting in me making and eating these scrumptious treats! For the recipe to make them, i was redirected here to Beansy Loves Cake yet another awesome foodie blog! =)


I usually make this caramel by boiling the can, submerged in water for a few hours (depending on the consistency of caramel needed) BUT i couldn't find any cans that didn't have a "ring pull" top, and i didn't fancy having any messy explosions to clean up. It's a technique my dad taught us at home, he used to make it and keep it in the fridge and eat it straight out of the can! A very special treat!


SO after freaking out a little and checking online, i found this recipe where you simply just pour the can of condensed milk into a glass pie dish, snugly cover it with foil, place that dish in a larger glass dish that is filled with water half way up the pie dishes edge, and bake in an oven at 220C for as long as needed to get the consistency you desire, works a treat.

I baked mine (two cans so i had enough for the whole recipe) for 2 hours, which is great for adding to the biscuit mix, but i think it needed a further half an hour for the filling, as mine is just ever so slightly gooey enough for the tops to, not right away, but eventually sliiiiiiiiide off, heh. =)

These cookies have a wonderful colour.....
And i must admit the recipe was easy to follow and turned out perfectly!


Dulce de Leche Duos
by Dorie Greenspan from Baking From My Home to Yours

2 1/2 cups all-purpose flour
1 t baking soda
1/2 t salt
2 sticks (8 oz) unsalted butter, at room temperature
3/4 cups store-bought dulce de leche, plus more for filling
3/4 cup packed light brown sugar
1/2 cup sugar
2 large eggs

Position the racks to divide the oven into thirds and preheat the oven 350 degrees F. Line two baking sheets with parchment or silicone mats.

Whisk together the flour, baking soda and salt.

Working with a stand mixer, preferably fitted with a paddle attachment, or with a hand mixer in a large bowl, beat the butter at medium speed until soft. Add the 3/4 cup of dulce de leche and both sugars and continue to beat until light and fluffy, about 3 minutes. Add the eggs one at a time, beating for 1 minute after each addition. Don't be concerned if the mixture looks a little curdled- it will smooth out when the flour mixture goes in. Reduce the mixer speed to low and add the dry ingredients, mixing only until they disappear into the batter.

Spoon the dough onto the baking sheets, using a heaping teaspoon of dough for each cookie and leaving 2 inches between them.

Bake the cookies 10 to 12 minutes, rotating the pans from top to bottom and front the back at the midway point. The cookies should be honey brown with a light sugar crust, but they will still be soft, so remove the sheets from the oven but don't touch the cookies for another minute or two. Then, using a wide metal spatula, transfer the cookies to a rack to cool to room temperature.

Repeat with the remaining dough, making sure you cool the baking sheets before spooning the dough onto them.

When the cookies are completely cool, spread the flat bottoms of half the cookies with a small amount of dulce de leche, and sandwich with the flat sides of the remaining cookies.

Makes about 30 sandwich cookies

Monday, March 22, 2010

banana bread

i always buy bananas with the best intentions of eating them in many different ways. on grainy toast with honey, cut up on cereal, in a smoothie.....but they always end up overripe before i know it and i have to bake something with them! (what a shame, hehe)

i am still trying to find that banana bread recipe that i can use over and over again, that doesn't have half a million different ingredients or fancy ways to make it. sometimes if a recipe is more than a page long i won't bother with it, unless i really like what it has to offer! i came across this recipe from Lovin' From the Oven and it sounded and looked SO good!

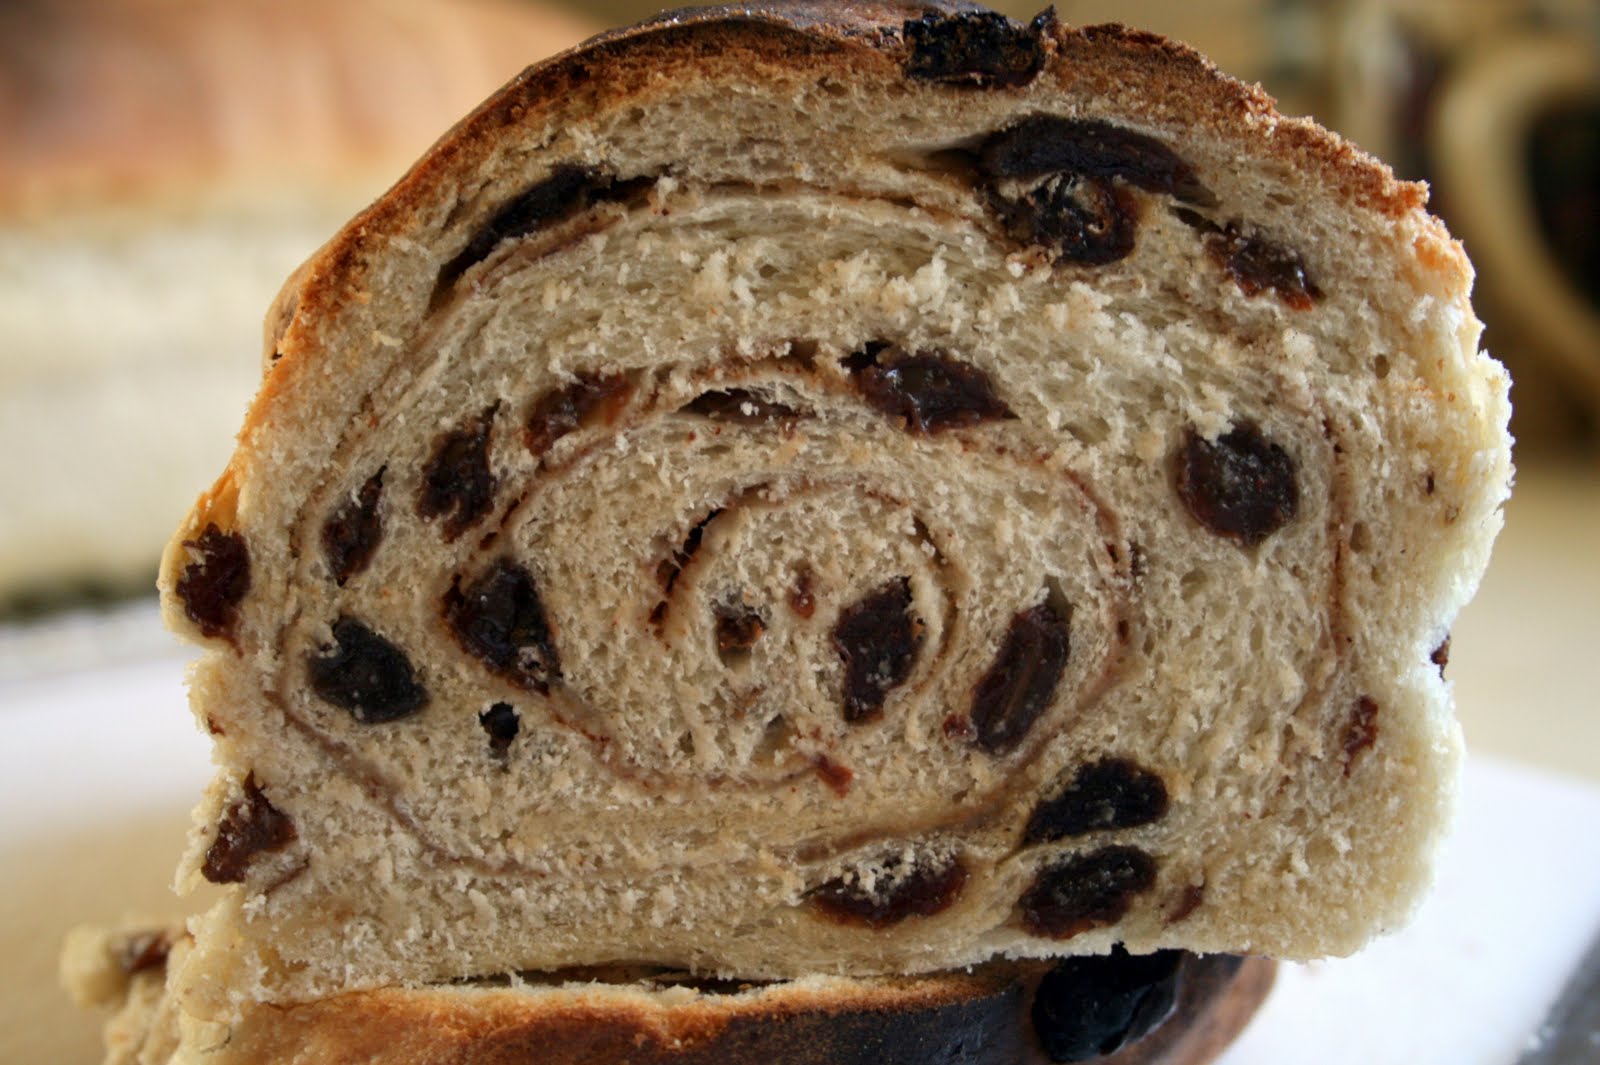
as you can see it turned out delicious! i split it into two tins so that it would be easy to cut and fit into hubby's lunch box. (he hates it when i call it that =P)

i made it as the recipe stated, with one extra banana and cinnamon on top instead of swirled in. i can't help myself. i can't just make a recipe as it is! i always have to add more filling or flavour items than stated. theres nothing wrong with abundance and there is nothing worse than biting into something and hardly seeing or tasting it after all the work!

Cinnamon Topped Banana Bread - the recipe as i made it =)

For the bread:

• 4 over-ripe bananas, smashed up
• 1/3 cup melted butter
• 3/4 cup sugar
• 1 egg, beaten
• 1 tsp vanilla
• 1 tsp baking soda
• dash of salt
• 1 3/4 cups flour

For the topping:

• 1/4 cup sugar & brown sugar mix
• 1 Tbsp cinnamon

1. Preheat oven to 350F/180C. Butter and flour a loaf pan, i lined mine with parchment paper also, better to be safe than sorry! I used two 8.5" x 4.5". For the normal sized loaf use one. Just keep a close eye on it in the oven, and adjust the time as needed.

2. Mix bananas, butter, sugar, egg, and vanilla together. Sprinkle baking soda and salt around on top of the banana mixture. Then gently stir in flour. Be careful not to over-mix!

3. In a small dish, mix together the 1/4 cup sugar and 1 Tbsp cinnamon.

4. Add the batter to the loaf pan and then sprinkle the cinnamon-sugar mixture all over the top of the batter in the pan.

5. Bake for 50-60 minutes, but remember, if you’re using a different-sized loaf pan, be careful and keep a close eye on it! For my two tins of half batter it took 35-40 minutes to be beautifully done, with a lovely cinnamon crunch top =)


.....and, it's gone. Thankyou Lovin' From the Oven! I think this is my new banana bread favourite!

Thursday, March 18, 2010

tourtière, round two

I think i really love this pie right now, although it's spring and coming into light, healthy weather. My husband has switched to nights for a month, and as i am so used to getting dinner ready for him i used this opportunity to bake a few things for him to take and heat up!

Wednesday, March 17, 2010

rainbow sugar cookies

What better way to celebrate St Patricks Day or any day for that matter, than with rainbow sugar cookies! Now i wouldn't have been able to do this if i hadn't have seen Cheeky Kitchen's fabulous blog! She did an amazing job on her cookies, colour, shape and that difficult little shamrock centre...which i gave up on and made plain green rounds instead =)


Saturday, March 13, 2010

sweet scroll buns

So the house was very happy this weekend as i decided to experiment with some sweet buns!

I had a look around the kitchen and improvised with what i already had. Mixed up a little raspberry jam with some blueberry preserve (flavour one), cinnamon sugar of course (flavour two), chopped up and toasted some almonds and added raisins with cinnamon sugar (flavour three) and well...why not Nutella (flavour four)!


So i took that recipe for white bread, divided it into four for the first rise (remembering here to knead raisins into one piece) and when it came time to punch down and roll it up, i filled each piece of dough with a different filling and rolled it up from the long edge, cut them into 8 pieces and filled four greased 20cm round cake tins with little scrolls, one flavour in each. As you can see above, the before shots, after they had risen into puffy little scrolls! Thinking about it now, seven pieces would have fit better, i just have a thing for cutting even numbers =)

So again, here is the original white bread RECIPE with a few of my adjustments:

makes four trays of 7 scrolls (i made four trays of 8 scrolls)
i used 20cm round cake tins

5 1/2 -6 cups all-purpose flour
3 tbsp sugar
4 tsp Active Dry Yeast
1 teaspoons salt
1-1/2 cups water
1/2 cup milk
2 tablespoons butter or margarine

Directions

Place 1/4 cup warm water (100° to 110°F) in a large warm bowl.
Sprinkle in yeast and 1 teaspoon sugar; stir.
Let sit 5 to 10 minutes, until foamy on top.

In a large bowl rub butter into sugar, salt and 5 cups flour.
Add water and milk.
Mix well using the medium speed of an electric mixer, scraping bowl occasionally. Or by hand, like me. Stir in extra flour to make a soft dough, if needed.

Knead on lightly floured surface until smooth and elastic, 8 to 10 minutes.
Divide into four. I found that size ball easier to knead and deal with. Remember at this point to add in your raisins to one ball of dough (if you are making a batch with raisins in)
Place in a greased bowls, turning once to grease the tops.
Cover; let rise in a warm, draft-free place until doubled in size, about 45 to 60 minutes.

Punch dough down.
Roll each ball of dough to 12 x 7-inch rectangle. Or a little larger for more swirling.
Fill each piece with your desired fillings.
Begin with the 'long' side of each rectangle, roll up tightly as for jelly roll for scrolls.
(If you want to make it an actual loaf, start at the 'short' end of each rectangle, roll up tightly as for jelly roll)
Pinch seams to seal. Cut each loaf into 8, or 7 i think now would be better.
Place, cut sides up, in greased pie tins.
Cover; let rise in warm, draft free place until doubled in size, about 45 minutes.

Bake at 200°C = 400°F for 25 to 30 minutes or until done. Turn half way to get an even colouring. Make sure they are lower in the oven, too high will result in your tops burning to soon! Cover tops of buns loosely with foil if they are getting too dark and they aren't ready yet.
Remove from pans; cool on wire rack.

Drizzle with icing while still hot. I used a simple icing sugar/milk mix that was a little runny, so it left a nice drizzly pattern across the tops. I added a little pink for the jam ones and cocoa for the Nutella ones....hmm....theres that chocolate overload...(you'll see further down)

My husband loved the cinnamon sugar ones, for their filling i used 1/8 cup sugar, 1/8 cup brown sugar and 1 teaspoon cinnamon, he said they tasted like Tim Hortons Honey-Dipped Doughnuts!! =)

The jam ones were terrific, super sticky and not too sweet, the blueberry preserve kept it more fruity while the raspberry jam gave it the tart sweetness! Although 1/4 to 1/3 cup of filling would have been enough i used around 1/2 cup and it oozed out a bit as i cut it. This is how i learn!

The raisin, cinnamon and almond ones were great! I used the same amount of cinnamon sugar as the plain cinnamon buns and around 1/4 cup raisins and 1/4 cup chopped almonds.

The Nutella ones. Well. They were just plain too chocolatey. Suprisingly enough we all thought it was overkill, oops. I did use a 1/4 cup of Nutella. Next time i think i'll heat up a little and drizzle it over the dough rather than spread it. Adding 1/4 cup chopped toasted hazelnuts might be good too!

Next time i'd like to try apple & walnut, apricot & almond, bluberry & cream cheese (using that scrummy pie filling blueberry stuff you get here!) My husband suggested a chocolate powder sugar for the next chocolate trial, similar to the cinnamon sugar mix, so it isn't as heavy....

Wednesday, March 10, 2010

cinnamon raisin scroll buns

So, i've made white bread, honey wheat bread and cinnamon raisin bread....so why not turn that raisin bread into scroll buns? Originally i made cinnamon raisin bread using the white bread recipe, i added soaked raisins to the dough (using the raisin water in the dough also) and sprinkled cinnamon sugar inside before rolling it up. Turned out a treat!

This time i did the same, added a little extra cinnamon sugar, rolled it up lengthways instead of from the short end, cut into 1 1/2 inch scroll pieces and VOILA! I drizzled some plain icing over the top as soon as it came out of the oven and the house smelled DIVINE! My husband came home from work and demolished most of it with his evening coffee....

When a recipe works out perfectly every time, i tend to stick to it, i'm funny like that. I like to see if i can adjust it to what i want rather than try a new recipe, having had a few new recipes not turn out on me. I like simple straight up recipes too, nothing long winded and three pages long, just make and bake. Like the old saying "when you're onto a good thing stick to it!"

So again, i used the original white bread RECIPE with a few adjustments:

I wanted it to be a sweeter bread this time so i put in the original suggested sugar amount and used 1 1/2 cups raisins, soaked in hot water for 1 hour before using (ends up being 2 cups of raisins, save raisin water and use in the dough for added flavour)

I needed to add an extra cup of flour due to the raisins adding moisture

i also added 1/4 cup finely chopped almonds to one loaf which tasted great!

The recipe revised as i used it:
Cinnamon Raisin Scroll Buns or Loaves

makes 3 trays of 7 scrolls ( i made 2 loaves and one tray of scrolls) or 3 loaves

6 -6 1/2 cups all-purpose flour
3 tbsp sugar
4 tsp Active Dry Yeast
1 teaspoons salt
1 1/2 cups raisins (soaked)
1-1/2 cups raisin water
1/2 cup milk
2 tablespoons butter or margarine
for the filling: mix 1/4 cup brown sugar, 1/4 cup sugar, 2 tsp cinnamon

Directions

Place 1/4 cup warm water (100° to 110°F) in a large warm bowl.
Sprinkle in yeast and 1 teaspoon sugar; stir.
Let sit 5 to 10 minutes, until foamy on top.

In a large bowl rub butter into sugar, salt and 6 cups flour.
Add active yeast, remaining raisins, water and milk.
Mix well using the medium speed of an electric mixer, scraping bowl occasionally.
Or by hand, like me.
Stir in extra flour to make a soft dough, if needed.

Knead on lightly floured surface until smooth and elastic, 8 to 10 minutes.
Divide into three. I found that size ball easier to knead and deal with.
Place in a greased bowls, turning once to grease the tops.
Cover; let rise in a warm, draft-free place until doubled in size, about 45 to 60 minutes.

Punch dough down.
Roll each ball of dough to 12 x 7-inch rectangle. Or a little larger for more swirling.
Fill with a sprinkling of cinnamon sugar mix, or desired filling.
Begin at long side of each rectangle, roll up tightly as for jelly roll for scrolls.
(Start at the short end of each rectangle, roll up tightly as for jelly roll if you're making loaves)
Pinch seams to seal. Cut each roll into 7.
Place, cut sides up, in greased 20cm cake tins.
Cover; let rise in warm, draft free place until doubled in size, about 45 minutes.

Bake at 200°C = 400°F for 25 to 30 minutes or until done. Turn half way to get an even colouring. Don't place the trays too high in the oven or the tops will darken too fast.
Cover tops loosely with foil if they are getting too dark and the bread isn’t ready.
Remove from pans; cool on wire rack.

I have to say, i am really enjoying making bread, it is very satisfying! Although it is incredibly dissappointing when it fails, after all the hard work you put in. As long as you take your time and be patient when waiting for it to prove ( i want to bake it NOW!) it all turns out in the end =)

Monday, March 8, 2010

honey ginger bites

I was out of eggs this morning, but felt like making a treat to go with coffee for our afternoon tea treat this week. I found this recipe, which i had all the ingredients for. I love gingerbread and i love honey and thats what these little devils taste like...

Really easy to make and bake. I think next time i may only put in 1 to 1 1/2 tsp ginger it does come out quite strong, but nice with a glass of cold milk! I changed the honey from 1/4 cup to 1/2 cup instead of golden syrup (didn't have any) and put in 1/4 cup brown sugar in its place. Needed to compromise as i was missing that one ingredient. Still, i'm new at improvising and glad they turned out alright! =)

Honey Ginger Bites ~ as i made them
ORIGINAL Recipe found here
Makes about 40

Ingredients
• 60g butter
• 1/4 cup brown sugar
• 1/2 cup honey
• 1 3/4 cups plain flour
• 1 teaspoon bicarbonate of soda
• 2 teaspoons ground ginger
• 3 teaspoons milk

Method

1. Preheat oven to 180°C. Melt butter in a saucepan over medium heat. Increase heat to medium-high. Stir in golden syrup and honey. Bring to the boil. Remove from heat. Allow to cool for 10 minutes.

2. Sift flour, bicarbonate of soda and ginger together into butter mixture. Add milk and stir until well combined. Cover and set aside for 1 hour or until dough is firm.

3. Using a teaspoon of mixture at a time, roll into balls. Place balls, 3cm apart, on lined baking trays. Using the back of a fork, lightly press cookie to make a cross hatch pattern on top. Bake, one tray at a time, for 5 minutes or until biscuits are golden brown. Allow to cool on trays.

The baking time was right on 5 minutes. I left one tray in a minute longer and they turned dark quite fast. They were nice and crunchy though, once cooled. I guess you could cook them to your taste =) If you store them in an airtight container, the next day they are soft and chewy ..mmm...

Saturday, March 6, 2010

raisin bread

I really enjoyed making the white bread, and thought, seeing as the recipe worked out so well that i could turn it into raisin bread. Everybody loves raisin bread! What better fresh out of the oven on a saturday morning! Mmmmm.....


Raisin Bread
Makes 3 loaves

5 1/2-6 1/2 cups all-purpose flour
3 tbsp sugar
4 tsp Active Dry Yeast
1 teaspoons salt
1 1/2 cups raisins (soaked)
1-1/2 cups raisin water
1/2 cup milk
2 tablespoons butter or margarine

For filling: ¼ cup brown sugar, ¼ cup sugar and 2 tsp cinnamon. Mix & Sprinkle.

Directions

Place 1/4 cup warm water (100° to 110°F) in a large warm bowl.
Sprinkle in yeast and 1 teaspoon sugar; stir.
Let sit 5 to 10 minutes, until foamy on top.

In a large bowl rub butter into sugar, salt and 5 cups flour.
Add remaining raisins, water and milk.
Mix well using the medium speed of an electric mixer, scraping bowl occasionally. Or by hand, like me.
Stir in extra flour to make a soft dough, if needed.

Knead on lightly floured surface until smooth and elastic, 8 to 10 minutes.
Divide into three. I found that size ball easier to knead and deal with.
Place in a greased bowls, turning once to grease the tops.
Cover; let rise in a warm, draft-free place until doubled in size, about 45 to 60 minutes.

Punch dough down.
Roll each ball of dough to 12 x 7-inch rectangle.
Spread with a sprinkling of cinnamon sugar mix, or desired filling.
Begin at the short end and roll up like a jelly roll.
Pinch seams to seal.
Use the greased loaf tins.
Cover; let rise in warm, draft free place until doubled in size, about 45 minutes.

Bake at 200°C = 400°F for 25 to 30 minutes or until done. Turn half way to get an even colouring.
Bake on a lower shelf in the oven to prevent the tops burning too fast.
Cover tops loosely with foil if they are getting too dark and the bread isn’t ready.
Remove from pans; cool on wire rack.

Friday, March 5, 2010

honey whole wheat bread

I love my brown bread. i love grains, whole wheat, ryes the works. but seeing as i'm new to this bread thing, i'm going to start with THIS honey whole wheat loaf.

I figure seeing as the white bread worked so well, this can't do me any wrong. I like to find a good recipe and stick to it, with the occasional change up, it's nice to know what the end result will be like every time!
It did, it turned out beautifully! It actually makes a rather large loaf, so i used 2/3 of the dough as a loaf (as you can see it's quite large) and made some dinner rolls, to have with salad in the evening =)

Honey Whole Wheat Bread

3/4 cup warm water (100° to 110°F)
1 envelope FLEISCHMANN'S Active Dry Yeast
3/4 cup warm milk (100° to 110°F)
2 tablespoons honey
2 tablespoons vegetable oil
1 teaspoon salt
2 to 2-1/2 cups all-purpose flour
2 cups whole wheat flour

Directions (remember to prepare the yeast as per the jars instructions first)
Place 1/4 cup warm water in large warm bowl. Sprinkle in yeast; stir until dissolved.
Add remaining water, warm milk, honey, oil, salt, and 1-1/2 cups all-purpose flour; blend well.
Stir in whole wheat flour and enough remaining all-purpose flour to make soft dough. Knead on lightly floured surface until smooth and elastic, about 6 to 8 minutes. Place in greased bowl, turning to grease top.
Cover; let rise in warm, draft-free place until doubled in size, about 30 to 45 minutes.

Punch dough down.
Remove dough to lightly floured surface; roll to 12 x 8-inch rectangle.
Beginning at short end, roll up tightly as for jelly roll.
Pinch seam and ends to seal.
Place, seam side down, in greased 9 x 5-inch loaf pan.
Cover; let rise in warm, draft-free place until doubled in size, about 45 to 60 minutes.

Bake at 375°F for 35 minutes or until done. Remove from pan; let cool on wire rack.

Happy Baking!

Thursday, March 4, 2010

white bread

I have always wanted to make bread, to have homemade bread at home. It's been a long time since i did my cooking school training and bread just wasn't one of the things i had the chance to make often. So i decided to start now, while i have the time, to experiment with it.

My husband just loves home cooking. He is a meat and three veg kinda guy. SO when he came home and i had fresh white bread and slow cooker beef stew for dinner he was wrapt! Simple and delicious.

On top of that, i was so very happy it turned out! I remember trying back in the day and not having the desired results everytime. YAY =)
I used THIS RECIPE for starters. Thinking that a site using the same yeast as me would help, in my mind anyways, hehe. I only used 2 tsp of sugar NOT the 3 tbsp as quoted. That's too much for a regular loaf if you ask me. And i used the Active Yeast not the RapidRise.

So pleased was i when all the hard work turned out like this:

The one thing i've found since living here in Canada is, there is an high sugar content in a lot of the shop bought breads. I can taste it. In Australia there is a limit on how much sugar you can put in commercial breads, i remember years ago when even McDonalds had to stop putting so much sugar in their buns! So This way i get to make sure it is JUST bread we are eating and as much as i love white bread it's no good for my waistline, so i'll experiment with wholewheat and grains for myself. Hubby however, wants the white, loves it. Oh and raisin bread...mmmmm!

The recipe revised as i used it:

Makes 2 Loaves

5-1/2 cups all-purpose flour
2 tsp sugar
4 tsp Active Dry Yeast
2 teaspoons salt
1-1/2 cups water
1/2 cup milk
2 tablespoons butter or margarine

Directions

Place 1/4 cup warm water (100° to 110°F) in a large warm bowl.
Sprinkle in yeast and 1 teaspoon sugar; stir.
Let sit 5 to 10 minutes, until foamy on top.

In a large bowl rub butter into sugar, salt and 5 cups flour.
Add remaining water and milk.
Mix well using the medium speed of an electric mixer, scraping bowl occasionally. Or by hand.
Stir in extra flour to make a soft dough, if needed.

Knead on lightly floured surface until smooth and elastic, about 8 to 10 minutes.
Divide into two.
Place in a greased bowl, turning once to grease top.
Cover; let rise in a warm, draft-free place until doubled in size, about 45 to 60 minutes.

Punch dough down.
Roll each half to 12 x 7-inch rectangle. Or whatever you would like to make.
Beginning at short end of each rectangle, roll up tightly as for jelly roll.
Pinch seams and ends to seal.
Place, seam sides down, in greased 8-1/2 x 4-1/2 inch loaf pans.
Cover; let rise in warm, draft free place until doubled in size, about 45 minutes.

Bake at 200°C = 400°F for 25 to 30 minutes or until done. Turn half way to get an even colouring.
Cover tops loosely with foil if they are getting too dark and the bread isn’t ready.
Remove from pans; cool on wire rack.
Related Posts Plugin for WordPress, Blogger...