Sunday, October 31, 2010

banana cream pie


I'm not going to mess around here. I know you all want to know how to make this pie. So i'll keep this blurb SHORT!! I researched ALL over the shop for a recipe i thought looked and sounded good enough for my hubby on his birthday! I'll admit also that i have never tasted or made a banana cream pie so this was quite the challenge to get right. My husband said it's one of his favourites!!! I took my chance on a mish mash of a few recipes i found ...


Banana Cream Pie

250g cream cheese, room temperature
1 tin sweetened condensed milk
1 packet vanilla pudding mix, dissolved in 3/4 cup water
2-3 cups whipped cream
2-3 ripe bananas
1 ready made OR homemade 9-inch/23-cm DEEP pie base (sweet shortcrust)
(OR 2 regular depth 9-inch/23-cm bases, this makes quite a bit of filling, would be great for tarts also!)

1 - Pre-bake and prepare your pie crust so it is cooled and ready to fill =)

2 - Beat cream cheese until soft and slowly add in the condensed milk, then slowly add in the pudding mixture, beat until light, thick and creamy. The pudding mix will start to thicken and will set in the fridge.

3 - Gently fold in the whipped cream, start with 1 cup and add more to taste, if you like it sweet and heavier leave it, if you'd prefer a lighter creamier pie add more cream, you can use the left-over cream to put on top to serve! ( i used 2 cups of whipped cream IN my pie)

4 - Line the pie crust with a little pie mixture, then slice up your bananas and place them down in one layer across the top. Top with more pie mixture and add a second layer of bananas if you choose. Finally top with remaining mixture and pop into the fridge to chill and set!

Make it advance so that it has time for the banana flavour to permeate the pie.....trust me, it's worth the wait.....it's really GOOD!!

5 - To serve top with whipped cream, cut and serve!

I recommend if it's just for at home, serve with whipped cream on the side for each piece, the pie will store better without the fresh cream on top. Either way you WILL NOT regret trying this pie....seriously ours is already half gone!!! hehe

Thursday, October 28, 2010

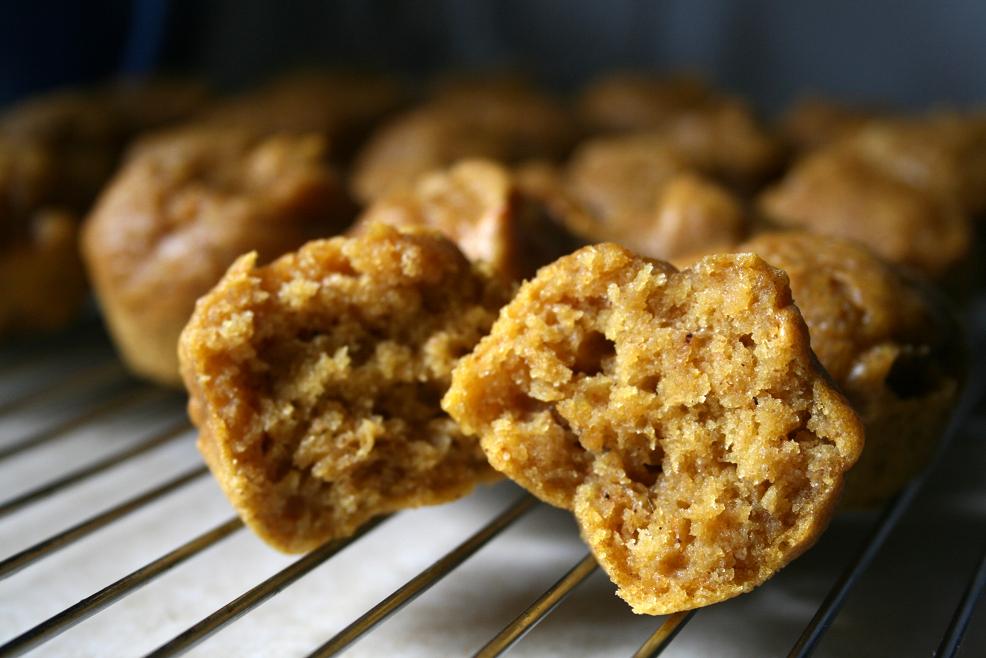
pumpkin pie muffins


Oh yeah.... pumpkin addiction is terrible. Terribly DELICIOUS! hahahaha
Ever since that pumpkin pie at Thanksgiving i can't help wonder what else can be made with that scrumptious flavour...SO many things i have found out! So when i came across muffins, i HAD to make them first. Well, i made pumpkin snickerdoodles and pumpkin pie already, but why stop there?

These muffins are MOIST and delicious with just the right amount of sweetness and spice!!

Pumpkin Muffins

1 1/2 cups plain flour
1 tsp baking soda
500g canned pumpkin puree
1/3 cup vegetable oil
2 eggs
1/2 tsp ground cinnamon
1/4 tsp ground allspice
1/4 tsp ground cloves
1/4 tsp ground nutmeg
1 1/4 cups sugar
1/2 tsp salt

Mix all ingredients together, fill a greased muffin or mini muffin tray 3/4 full.
Bake @ 350F for 12-15 minutes or until a skewer comes out clean.

I made 42 mini muffins with this batch. They also freeze really well, just spread them out on a cookie sheet and freeze for 30 minutes then pop in a ziploc bag for storage.

Easy peasy. Y.U.M. =) i thought about adding cream cheese icing to the top..now that would be a little decadent don't you think?? =) Happy Baking!

Sunday, October 24, 2010

spiced raisin rice pudding


It was cool yesterday, and i was browsing a magazine while watching our little man do his 'word wall" practice, and i came across this recipe. I LOVE rice pudding, i love sweets. Dessert was always something special we looked forward to after dinner when i was growing up, mostly on weekends when Mum had the time to do it.

Spiced Raisin Rice Pudding

4 cups milk
1 cup long grain rice
3/4 cup sugar
1/4 tsp salt
3/4 cup raisins
1/4 tsp allspice

Bring the rice, milk, sugar and salt to a gentle simmer in a saucepan, covered, for around 30 minutes, stirring occasionally.
Add the raisins and allspice, stir well and cover up again at a gentle simmer for 30 minutes or so more.
Stir often as you don't want the mixture to stick to the bottom of the pan.
Cook as long as necessary to make the rice tender and the sauce thicken.

This recipe was delicious, i had a little more thani should have, so did the boy! He had never had anything like it (i swear the only things his mum fed him were grapes, nuts, plain toast and milk!!!) and he loved it! SO much so he had it in his lunch box today =)

It did take me about an hour and 15 mins to get it to the right tenderness...but i used arborio rice instead...shhh...don't tell anyone!! Still...try it, it's scrumptious on a cold night, comfort food indeed!

Wednesday, October 20, 2010

peanut butter & honey popcorn


Ok, so it was late and a snack was required, but instead of just plain popcorn, i thought WHAT THE HELL!! And gave Real Mom Kitchen's Recipe for peanut butter & honey popcorn a go!!

Peanut Butter & Honey Popcorn

•8 cups popped lightly salted popcorn
•1/2 cup sugar
•1/2 cup honey
•1/2 cup peanut butter
•1/2 teaspoon vanilla

1.Place popcorn in a large bowl. In a small saucepan, combine sugar and honey. Bring to a rolling boil.

2.Remove from heat and stir in peanut butter and vanilla until smooth.

3.Pour peanut butter syrup over popcorn and stir thoroughly to evenly coat. Spread the popcorn out on to a lined cookie sheet to cool for a few minutes and enjoy!

Saturday, October 16, 2010

wholewheat pizza dough


Trying to be healthy i made wholewheat pizza dough for me and the boy, hubby loves his white breads! This turned out amazing, we made little pizza bears with homemade tomato paste base & cheese, with pepperoni smiles and olive eyes for the boy's lunches (freeze wellin individual sandwich bags, defrost overnight!) and bbq chicken pizza with green peppers, onion and cheese for dinner!! Yummy =)


Pizza Dough

1 1/2 cups warm (105-115 degrees) water
1 Tbsp. sugar
1 Tbsp. yeast
1/2 tsp. salt
3-4 1/2 cups wholewheat flour

In a large bowl combine water, sugar, and yeast. Let stand for 10 minutes or until yeast is bubbly.

Add salt and stir. Add 1 1/2 cups flour and mix well.
Gradually add more flour (usually between 3-4 cups, depending on your elevation and your humidity) until dough starts to pull away from the sides of the bowl and it barely sticks to your finger.

Spray with cooking spray or rub oil in a glass or metal bowl and place dough in the bowl. Cover and allow to rise for 45 minutes or until doubled in size.

Remove from bowl and place on a lightly-floured surface. Spray a baking sheet with cooking spray. Roll out into a rectangle to cut shapes out of or a circle/square for a pizza base.

This is where you top your pizza....the variations are endless!

Cover pan and allow dough to rise for another 30 minutes. When there's about 15 minutes to go, preheat your oven to 425F. When done rising, bake for 10-12 minutes or until golden brown.

Wednesday, October 13, 2010

wholewheat cornmeal corn waffles


Ok, so we are going through a minor waffling stage right now. The boy LOVES corn, typical the vegetable with the least amount of nutritional value!! So i thought, hmmm, cornmeal, corn, WAFFLE!!! These turned out alright, he eats them with a homemade tomato/pasta sauce for a dip!


Corn & Cornmeal Waffles
1 cup flour
1 cup cornmeal
3 tsp baking powder
1 tsp salt
1 tbsp sugar
2 eggs
1 1/4 cup milk
1/2 cup corn kernals

Miz all ingredients to combine.
Cook according to your waffle iron's instructions.
I used 1/2 cup batter for each waffle and made 6 with this batter batch.

We used wholewheat flour to make these which turn out quite heavy with the cornmeal, next time i will use plain flour!
(Note* have made these with plain flour and are MUCH better!!)

Tuesday, October 12, 2010

pumpkin snickerdoodles

Ever had a Snickerdoodle before? Not me. Never even heard of them until i happened across them on the internet. Usually a cinnamon sugar delight, this pumpkin version is SO GOOD!!! You gotta try these, seriously!


Little sugar & spice dipped balls............


Flattened sugar & spice dipped balls (as recommended by the recipe girl)


Bake & VOILA! Delicious little spiced pumpkin bites ...nom...nom...nom...

Pumpkin Snickerdoodles

Recipe courtesy of Recipe Girl

COOKIES:
1 cup butter, at room temperature
1 1/2 cups granulated sugar
3/4 cup pure pumpkin puree
1 large egg
2 tsp pure vanilla extract
3 3/4 cups all-purpose flour
1 1/2 tsp baking powder
1/2 tsp salt
1/2 tsp ground cinnamon

ROLLING SUGAR:
1/2 cup granulated sugar
1 tsp ground cinnamon
1/2 tsp ground ginger
1/2 tsp allspice


1. In a large bowl, cream butter with an electric mixer until fluffy. Add sugar and pumpkin puree and beat well. Mix in egg and vanilla, scraping down sides of the bowl to incorporate all of the ingredients.

2. In a medium bowl, whisk together flour, baking powder, salt and ground cinnamon. Beat flour mixture into liquid mixture a little at a time until incorporated.

3. Cover dough with plastic and chill at least an hour, or until dough becomes slightly firm.

4. When ready to bake, preheat oven to 350°F. Line baking sheets with parchment paper (or spray with nonstick spray). Mix rolling sugar in a small bowl.

5. Remove cookie dough from refrigerator. Roll cookie dough into one inch balls. Use your hands to roll the balls in the cinnamon sugar and make sure they’re coated really well. Place 2 inches apart on the prepared baking sheets. Use a glass with a nice, flat bottom to dip in sugar and flatten the balls.

6. Bake at 350°F. for 10 to 14 minutes, or until they are slightly firm to the touch. Let cool on baking sheets for 5 minutes or so, then remove them to a wire rack to cool completely.

I managed to make 55 little Pumpkin Snickerdoodles from this batch =)


Related Posts Plugin for WordPress, Blogger...